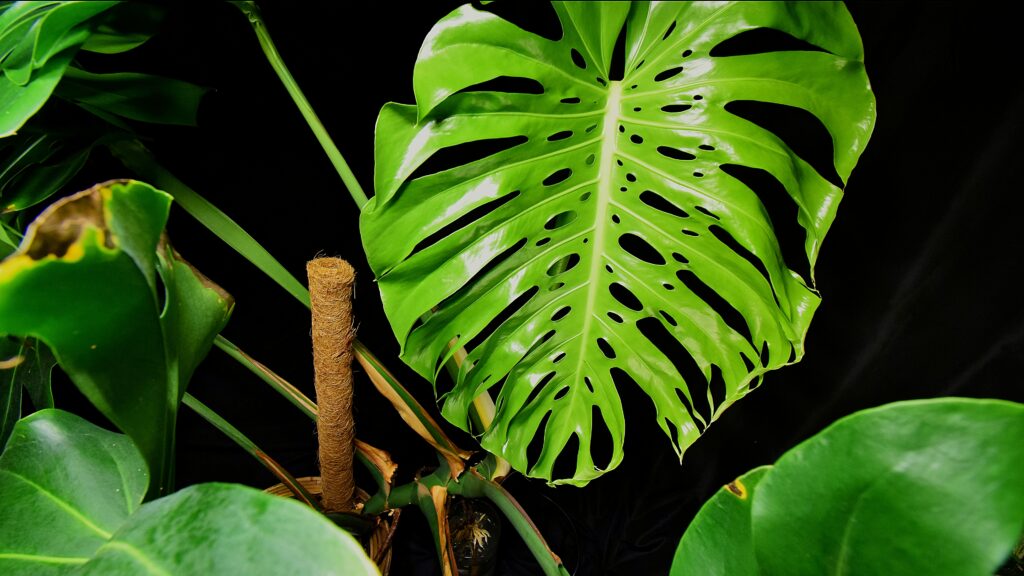
Welcome to my monstera care guide, where I’ll guide you through the process of growing a breathtaking monstera! Whether you’re a seasoned plant enthusiast or a newbie, this monstera tutorial has something for everyone. We’ll cover everything from soil mix to light requirements, and I’ll share my tips for propagating and repotting these gorgeous plants. Let’s dive into the world of monsteras and uncover the secrets to growing these stunning plants.
Getting Started: The Perfect Soil Mix
Soil is one of the most crucial factors in growing any plant, and monsteras are no exception. They thrive in a soil mix that retains moisture but also drains well. For monsteras, a slightly acidic soil mix with a pH range of 5.5-6.5 is ideal. Understanding the components of your soil mix can make a significant difference in your plant’s health and growth.
The Ideal Soil Mix
Here’s my go-to soil mix for growing monsteras:
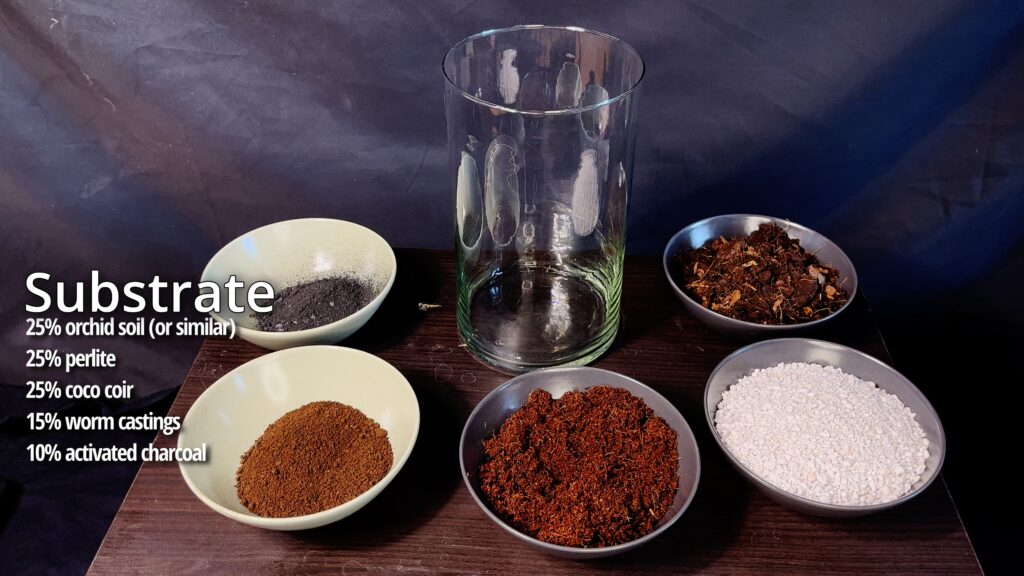
- 25% Orchid Soil: Orchid soil is typically composed of bark, perlite, and other chunky materials that provide excellent aeration. This mimics the natural environment of epiphytic plants like the monstera, which grow on trees and need good air circulation around their roots.
- 25% Perlite: Perlite is a lightweight volcanic glass that enhances soil aeration and drainage. It prevents soil compaction and helps the roots breathe, reducing the risk of root rot.
- 25% Coco Coir: Coco coir, made from coconut husks, retains moisture while providing good drainage. It’s a sustainable alternative to peat moss and helps maintain a balanced moisture level in the soil.
- 15% Worm Castings: Worm castings are an excellent organic fertilizer, rich in nutrients and beneficial microorganisms. They improve soil structure, enhance water retention, and provide a steady supply of nutrients to the plant.
- 10% Activated Charcoal: Activated charcoal helps purify the soil by removing toxins and impurities. It also prevents the growth of harmful bacteria and fungi, promoting a healthier root environment.
I use this mix for all my aroids, including monsteras! To prepare the soil, mix everything thoroughly until well-blended. This ensures that the roots have access to a consistent medium that supports healthy growth.
Enhancing Drainage
To further improve drainage, I add a bottom layer of pine bark to my pots. This extra layer helps excess water escape more efficiently, preventing waterlogged soil. Pine bark is also slow to decompose, so it provides long-term benefits to the soil structure.
Watering and Fertilizing
Proper watering and fertilizing are key to a healthy monstera. Understanding the plant’s water and nutrient needs can prevent common issues like overwatering, underwatering, and nutrient deficiencies.
Watering Your Monstera
Monsteras prefer their soil to dry out slightly between waterings. This mimics their natural habitat, where they experience periods of rain followed by drier conditions. Here’s my watering routine:
- Check the Soil Moisture: Before watering, check the soil moisture by sticking your finger about 1-2 cm into the soil. If it feels dry, it’s time to water. If it’s still moist, wait a few more days.
- Watering Method: To avoid overwatering, I water my plants in two steps. First, I water lightly and let the soil absorb it. After a few minutes, I water again until I see excess water draining from the bottom of the pot. This ensures the entire root system gets hydrated without waterlogging the soil.
- Water Quality: Always use room-temperature water to avoid shocking the roots. If possible, use filtered or distilled water, as tap water can contain chlorine and other chemicals that might harm your plant over time.
Fertilizing Your Monstera
Fertilizing provides essential nutrients that support healthy growth. Monsteras benefit from a balanced fertilizer with an N-P-K ratio of 3-1-2 (Nitrogen-Phosphorus-Potassium). Here’s how I fertilize my monsteras:
- Frequency: During the growing season (spring and summer), I fertilize every 7-14 days when using a plant lamp and once a month without. In the fall and winter, I reduce the frequency to once a month, as the plant’s growth slows down.
- Application: I mix the fertilizer with hand-warm water to help dissolve the nutrients more effectively. Then, I water the plant as usual, making sure the fertilizer reaches the root zone.
- Alternative Fertilizers: Multiple or similar N-P-K ratios also work well. Organic options like fish emulsion, seaweed extract, and compost tea can provide additional micronutrients and promote soil health.
Light and Humidity
Light and humidity are critical factors for the growth and health of monsteras. Providing the right environment can help your plant thrive and develop those iconic, fenestrated leaves.
Light Requirements
Monsteras love bright, indirect light. In their natural habitat, they grow under the canopy of larger trees, receiving filtered sunlight. Here’s how to provide the right light conditions:
- Bright Indirect Light: Place your monstera near a window where it can receive plenty of indirect sunlight. East-facing windows are ideal, as they provide gentle morning light. South or west-facing windows can work too, but make sure to filter the light with a sheer curtain to prevent direct sunburn.
- Avoid Direct Sunlight: Direct sunlight can scorch the leaves, causing them to develop brown spots and edges. If you notice any signs of sunburn, move your plant to a location with less intense light.
- Grow Lights: If natural light is insufficient, consider using grow lights. LED grow lights are energy-efficient and provide the right spectrum of light for plant growth. Measure the light intensity using a light meter, aiming for 10,000 to 15,000 lux. Adjust the distance between the light and the plant to achieve the optimal intensity.
 | By far the best way to measure light and find the best spot for your plants is to use one of those luxmeters. I got mine from amazon: https://www.amazon.de/-/en/dp/B07S82S5LN?ref_=ppx_hzsearch_conn_dt_b_fed_asin_title_2 |
Humidity Requirements
Monsteras thrive in high humidity, which mimics their tropical origins. Maintaining proper humidity levels can prevent issues like leaf browning and promote lush growth.
- Humidity Levels: Aim for humidity levels above 40%, with over 70% being ideal. In dry climates or during winter, use a humidifier to increase humidity around your plant.
- Misting: Regularly mist the leaves to keep them hydrated and clean. Use a fine mist spray bottle and avoid over-misting, which can lead to fungal issues.
- Humidity Trays: Place a tray filled with water and pebbles near your monstera. As the water evaporates, it increases the humidity around the plant.
- Grouping Plants: Grouping plants together can create a microenvironment with higher humidity. Plants naturally release moisture through transpiration, which benefits nearby plants.
Propagating Your Monstera
Propagating monsteras is straightforward and rewarding. You can use head cuttings or stem cuttings to create new plants. Propagation allows you to expand your collection and share the joy of monstera growing with friends and family.
Head Cuttings
Head cuttings involve cutting the top part of the plant, which includes a leaf and a node. Here’s how to do it:
- Select a Healthy Stem: Choose a stem with a healthy leaf and at least one node (a small bump where roots will grow).
- Make the Cut: Use a sharp, clean knife or razor blade to make a clean cut just below the node. Clean cuts reduce the risk of infection and promote faster rooting.
- Dry the Cutting: Let the cutting dry for a few hours to form a callus. This helps prevent rot when placed in water or soil.
- Rooting Medium: Place the cutting in water, perlite, or sphagnum moss. If using water, change it regularly to prevent stagnation and mold growth. If using perlite or moss, keep it moist but not waterlogged.
- Provide Indirect Light: Place the cutting in a location with bright, indirect light. After a few weeks, roots should start to develop. Once the roots are a few inches long, transplant the cutting into soil.
Stem Cuttings
Stem cuttings involve cutting a segment of the stem that includes at least one node and an aerial root. Here’s how to propagate using stem cuttings:
- Select a Healthy Stem: Choose a stem with at least one node, an aerial root, and a leaf.
- Make the Cut: Use a sharp, clean knife or razor blade to make a clean cut just below the node.
- Dry the Cutting: Let the cutting dry for a few hours to form a callus.
- Rooting Medium: Place the cutting in water, perlite, or sphagnum moss. Change the water regularly or keep the perlite/moss moist.
- Provide Indirect Light: Place the cutting in a location with bright, indirect light. Roots should start to develop in a few weeks.
Besides cuttings monsteras can also be grown from seeds! I lately started a project where i started to grow monsteras from seeds – find everything here: Growing Monsteras from seed
Repotting Your Monstera
Repotting is an essential part of monstera care, ensuring the plant has enough space to grow and access to fresh nutrients. Repotting is usually done every 1-2 years or when the plant outgrows its current pot.
When to Repot
Here are some signs that your monstera needs repotting:
- Roots Growing Out of the Drainage Holes: If you see roots emerging from the bottom of the pot, it’s time to repot.
- Slow Growth: If your plant’s growth has slowed down or stopped, it might be root-bound and need more space.
- Wilting Despite Watering: If your plant wilts even after watering, the roots might be cramped and not absorbing water properly.
How to Repot
Here’s my step-by-step guide to repotting monsteras:
- Prepare the New Pot: Choose a pot that’s 1-2 inches larger in diameter than the current one. Make sure it has drainage holes.
- Remove the Plant from the Old Pot: Carefully turn the pot on its side and gently tap it to loosen the root ball. You may need to cut the pot if the roots are tightly bound.
- Inspect the Roots: Check the roots for any signs of rot or damage. Trim off any unhealthy roots with sterilized scissors.
- Add a Bottom Layer: Place a layer of pine bark or pebbles at the bottom of the new pot for improved drainage.
- Add Soil: Add a layer of your soil mix to the new pot. Position the plant in the center and fill around the root ball with soil. Press the soil gently to remove air pockets.
- Water Thoroughly: Water the plant thoroughly to help the roots settle into the new soil. Allow the excess water to drain out.
- Adjust the Soil Level: After watering, the soil may settle. Add more soil if necessary to ensure the plant is stable.
- Provide Support: If your monstera is large, consider using a moss pole or support stick to help it grow upright.
Caring for Monstera Cuttings
Once your cuttings have developed sufficient roots, it’s time to transplant them into soil. Here’s how to care for your new monstera plants:
- Choose a Suitable Pot: Use a small pot with drainage holes for the initial transplant. This helps prevent overwatering and allows the roots to establish.
- Prepare the Soil: Use the same soil mix mentioned earlier. Fill the pot with soil, leaving enough space for the root ball.
- Plant the Cutting: Gently place the cutting in the pot and fill around the roots with soil. Press the soil gently to secure the plant.
- Water and Light: Water the plant thoroughly and place it in a location with bright, indirect light. Avoid direct sunlight during the initial weeks to prevent stress.
- Monitor Growth: Keep an eye on the plant’s growth. As it grows, you may need to repot it into a larger pot to accommodate its expanding root system.
Ideal Growing Conditions
Creating the perfect environment for your monstera involves understanding its needs and mimicking its natural habitat. Here are some detailed guidelines to help your plant thrive:
Substrate
Use the soil mix mentioned earlier for optimal growth. Monsteras prefer a well-draining, nutrient-rich mix that retains moisture without becoming waterlogged. The combination of orchid soil, perlite, coco coir, worm castings, and activated charcoal provides a balanced environment for root development.
Temperature
Monsteras thrive in temperatures between 18°C and 27°C (65°F to 80°F). They can tolerate slightly higher temperatures, but avoid exposing them to temperatures below 15°C (59°F). Sudden temperature changes can stress the plant, so keep it away from drafts and air conditioning vents.
Watering
Water when the top 1-2 cm of soil is dry, ensuring good drainage. In winter, reduce watering as the plant’s growth slows down. Always check the soil moisture before watering to prevent overwatering, which can lead to root rot.
Light
Monsteras need bright, indirect light to grow well. Aim for light levels between 10,000 and 15,000 lux. If natural light is insufficient, use LED grow lights to supplement. Avoid direct sunlight, which can scorch the leaves. Rotate the plant occasionally to ensure even growth and prevent it from leaning towards the light source.
Humidity
Aim for humidity levels above 40%, with over 70% being ideal for best growth. In dry climates or during winter, use a humidifier or place a tray of water near the plant. Grouping plants together can also increase humidity through transpiration. Regularly mist the leaves, especially during dry periods.
Repotting
Repot when roots outgrow the current pot, typically every 1-2 years. Use a well-draining soil mix and a pot with drainage holes. Repotting provides fresh nutrients and more space for root growth, promoting healthier and more vigorous plants.
Propagation
Use sharp tools for cuttings, and consider rooting in water, perlite, or sphagnum moss. Ensure the cutting has at least one node, an aerial root, and a leaf. Let the cutting dry before placing it in the rooting medium to prevent rot. Change the water regularly if rooting in water, and keep perlite or moss moist but not waterlogged.
Common Issues and Solutions
Even with the best care, you might encounter some issues with your monstera. Here are common problems and their solutions:
Yellowing Leaves
Cause: Overwatering, underwatering, or nutrient deficiency.
Solution: Check the soil moisture and adjust your watering routine. Ensure the plant is not sitting in waterlogged soil. Fertilize regularly to provide essential nutrients.
Brown Leaf Edges
Cause: Low humidity, underwatering, or excessive direct sunlight.
Solution: Increase humidity around the plant, adjust your watering schedule, and move the plant to a location with bright, indirect light.
Leggy Growth
Cause: Insufficient light.
Solution: Move the plant to a brighter location or use grow lights to supplement natural light. Rotate the plant regularly to encourage even growth.
Pests
Common Pests: Spider mites, aphids, and mealybugs.
Solution: Regularly inspect the plant for pests. Use insecticidal soap or neem oil to treat infestations. Increase humidity to deter spider mites.
Advanced Care Tips
For those looking to take their monstera care to the next level, here are some advanced tips:
Training Your Monstera
Monsteras can be trained to climb support structures like moss poles or trellises. This not only saves space but also encourages larger leaf growth.
- Install a Moss Pole: Place the moss pole in the pot when repotting. Secure the pole firmly to prevent it from tipping over.
- Attach the Stems: Use plant ties or soft twine to gently secure the stems to the pole. Be careful not to damage the stems.
- Maintain Moisture: Keep the moss pole moist to encourage aerial roots to attach and absorb water.
Pruning and Shaping
Pruning helps control the size of your monstera and encourages bushier growth. Here’s how to prune effectively:
- Sanitize Tools: Use sterilized scissors or pruning shears to prevent the spread of disease.
- Remove Dead or Yellowing Leaves: Cut off any dead or yellowing leaves to improve the plant’s appearance and health.
- Trim Leggy Stems: Cut back leggy stems to encourage new growth from the base.
- Shape the Plant: Prune selectively to shape the plant as desired. This can involve cutting back overgrown stems or thinning out dense areas.
Enhancing Leaf Development
Monsteras are known for their stunning fenestrated leaves. To encourage the development of these characteristic splits and holes:
Support Climbing: Encourage the plant to climb a moss pole or trellis. Climbing plants often develop larger, more mature leaves.
Provide Adequate Light: Ensure the plant receives bright, indirect light. Insufficient light can result in smaller, less fenestrated leaves.
Maintain High Humidity: High humidity promotes larger, more fenestrated leaves. Use a humidifier or mist the plant regularly.
Conclusion
And there you have it! Growing a stunning monstera doesn’t have to be daunting. With the right soil mix, proper watering and light, and a bit of patience, you can enjoy the beauty of these magnificent plants. Happy growing!
If you enjoyed this monstera tutorial and want to see more plant guides, feel free to subscribe to my channel or leave your questions in the comments! Happy planting!
