TL;DR – Regrowing Vegetables from Scraps
- Yes, you can regrow vegetables from scraps like celery, lettuce, scallions and carrot tops – mostly for fresh greens, not full-size veggies.
- Start the scraps in water to trigger root and leaf growth, then move them into soil for longer-term harvests.
- Keep them in bright light, evenly moist soil and mild temperatures for best results.
- It’s a fun, low-cost experiment and perfect for kids, beginners and balcony gardeners.
- I filmed the whole thing as a regrow vegetables from scraps time lapse; the video is embedded below.
Gardening Tutorial: Regrowing Vegetables from Scraps – Does It Really Work?
We’ve all seen those viral “magic kitchen hacks” that promise endless veggies from a single scrap. But can you actually regrow vegetables from kitchen scraps, or is it just clickbait? I wanted to know too – so I turned it into a gardening experiment and time lapse.
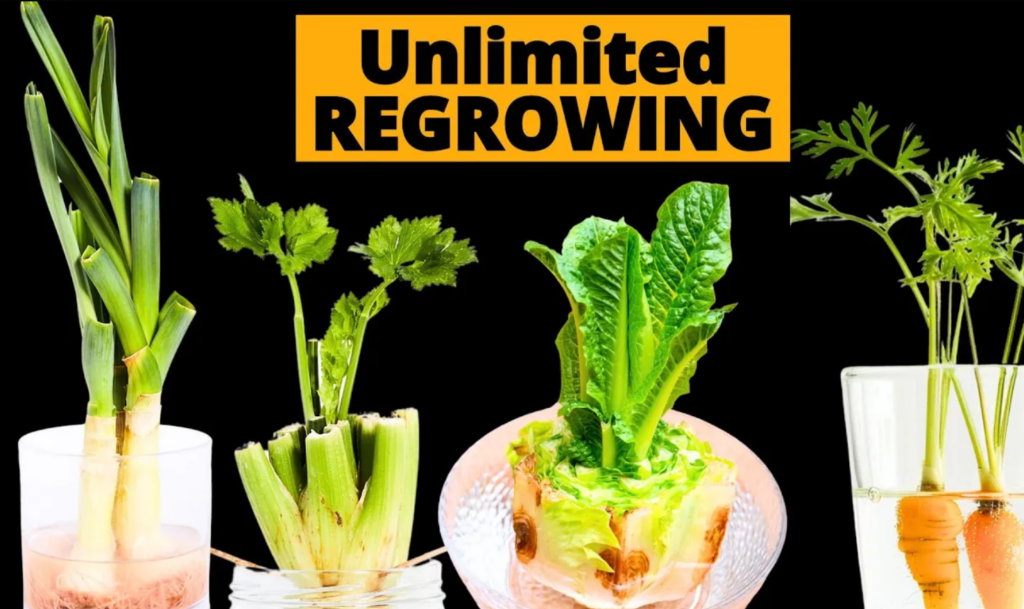
In this tutorial we’ll regrow celery, lettuce, scallions and carrots from leftovers you’d normally throw away. I’ll show you step by step how I did it, what worked, what didn’t, and how the plants looked after several weeks.
What You Need to Regrow Vegetables from Scraps

For this plant tutorial you only need a small shopping list and some kitchen leftovers:
- Celery base (the bottom 3–4 cm with the stalks cut off)
- Lettuce stump (e.g. romaine heart or head lettuce core)
- Scallions / spring onions (white part with roots)
- Carrot tops (1–2 cm of the top with the leaf area)
- Shallow bowls or jars, water and later a pot with potting soil
Other vegetables that often regrow from scraps include beetroot, other leafy lettuces, onions, pak choi, garlic and ginger. Once you understand the basic method, you can experiment with those too.
Step 1 – Start Your Vegetable Scraps in Water

First we turn kitchen waste into plant starters:
- Preparation
- Cut the edible parts off your vegetables, leaving the bottom or root section intact.
- For carrots, keep only the top slice – you’ll regrow fresh greens, not a new full carrot.
- Set Up the Water Bath
- Place the scraps in a shallow bowl or jar with the cut side up, roots down.
- Add just enough water to cover the root area or the bottom 0.5–1 cm.
- Top up or change the water every day or two so it stays fresh.

After a couple of days you’ll usually see tiny roots and pale new shoots forming. It looks a bit like zombie vegetables coming back to life – in a good way.
Step 2 – 8 Days Later: Lots of New Growth
Within about a week, things get exciting. The white, blanched parts turn green and start photosynthesizing, and you’ll see clear differences between the species:
- Celery: new stalks appear from the center of the base.
- Lettuce: fresh leaves form in a rosette where the old head was cut off.
- Scallions: green tops shoot up fast – these are the quickest win.
- Carrots: feathery carrot greens grow from the top slice.

Once the roots are a few centimeters long and the tops look strong, it’s time to transplant your regrown vegetables from water to soil. This gives them access to more nutrients and makes them much more stable.
Step 3 – Potting Up: Regrowing Vegetables in Soil

Fill a pot or planter with loose, humus-rich potting soil. Make a small hole for each scrap, set the roots into the soil and gently firm it around the base. Water thoroughly once after planting.
- Celery & lettuce – Plant the base just deep enough so the cut surface sits at soil level.
- Scallions – Bury the white part and roots, leaving the green tops above soil.
- Carrot tops – Press the slice lightly into the soil; you’re growing decorative greens and herbs, not new roots.
Over the next few weeks the regrown vegetables filled the pot with fresh leaves – perfect for snipping into salads, soups and garnishes.
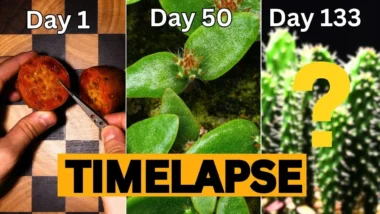
Time-Lapse: Regrowing Vegetables from Scraps in 45 Days
To document everything, I filmed the whole experiment as a 45-day regrow vegetables from scraps time lapse. You can literally watch the scraps wake up, root, and turn into a mini balcony garden.
What Worked Best (and What Didn’t)
So, does regrowing vegetables from scraps really work? Here’s what I found:
- Scallions: Clear winner. You can harvest the green tops and let them regrow several times.
- Celery: Regrows a smaller version of the original plant – great for cutting celery leaves and young stalks.
- Lettuce: Regrows a loose head, not a full supermarket-sized one. Perfect for a few sandwiches or garnish.
- Carrots: Only the carrot greens regrow, not the orange root – but the greens are edible and nice in pesto or salads.
In short: regrowing vegetables from scraps works, but mostly for endless greens rather than full replacement vegetables. Still, it’s a fun zero-waste experiment and a great way to get more out of your groceries.
Growing Conditions: Soil, Temperature, Watering & Light
To keep your regrown veggies happy after transplanting, focus on these basic care tips:
- Soil: Use a peat-free, humus-rich, well-draining mix. Adding compost gives your plants a nutrient boost after starting in plain water.
- Temperature: Most leafy vegetables prefer a mild range of about 60–75°F (15–24°C). Avoid frost and extreme heat.
- Watering: Keep the soil evenly moist but never waterlogged. Water when the top 2–3 cm of soil start to feel dry.
- Light: Place the pots on a bright windowsill with at least 6 hours of indirect to direct light per day. If you’re short on sunlight, add a small LED grow light.
With these conditions your regrown vegetable scraps will stay productive for much longer and you’ll get several small harvests from what was basically trash.
If You Enjoyed This Regrow Experiment, Try These Next:
Growing Tomatoes from Seed: Growing Tomatoes from Seed: A Journey from Seed to Harvest with Time-Lapse Magic
Broccoli from Seed Indoors: The Magical Journey of Growing Broccoli: From Seed to Harvest Timelapse
DIY Jar Ecosphere: Create Your Own DIY Jar Ecosphere: A Mesmerizing Timelapse Adventure
Recommended Materials
If you want to record your own regrow vegetables from scraps time lapse, check out my complete Plant Time-Lapse Equipment Guide, where I share my camera setup, interval settings and lighting tips.
👉 https://blog.interesting-as-fck.com/plant-time-lapse-equipment-all-you-need/
Follow for More Timelapses & Plant Experiments
All my social links: https://beacons.ai/interestingasfck
YouTube Timelapse: https://www.youtube.com/@interestingasfck
YouTube Tutorials: https://www.youtube.com/@interestingasfck
Instagram: https://www.instagram.com/interestingasfck.official/
TikTok: https://www.tiktok.com/@interestingasfck
Facebook: https://www.facebook.com/profile.php?id=61550590780487